Private nameservers (also known as custom or branded nameservers) are usually of use to hosting resellers, dedicated/VPS users, or anyone wanting their nameservers to show their own domain name (e.g., ns1.yourbrand.com instead of ns1.bragghost.com). This article covers how to create, register, and use private nameservers. If you do not have reseller or VPS/advanced hosting, you probably don’t need this.
STEP 1: Choose your nameserver names and IPs. Decide on the hostnames: commonly ns1.yourdomain.com and ns2.yourdomain.com. Note the IP address(es) you’ll use—provided by Bragghost if supported.
STEP 2: Log into your Bragghost Client Area. Find the domain and click inside your domain’s row (not the text link) to open domain settings.

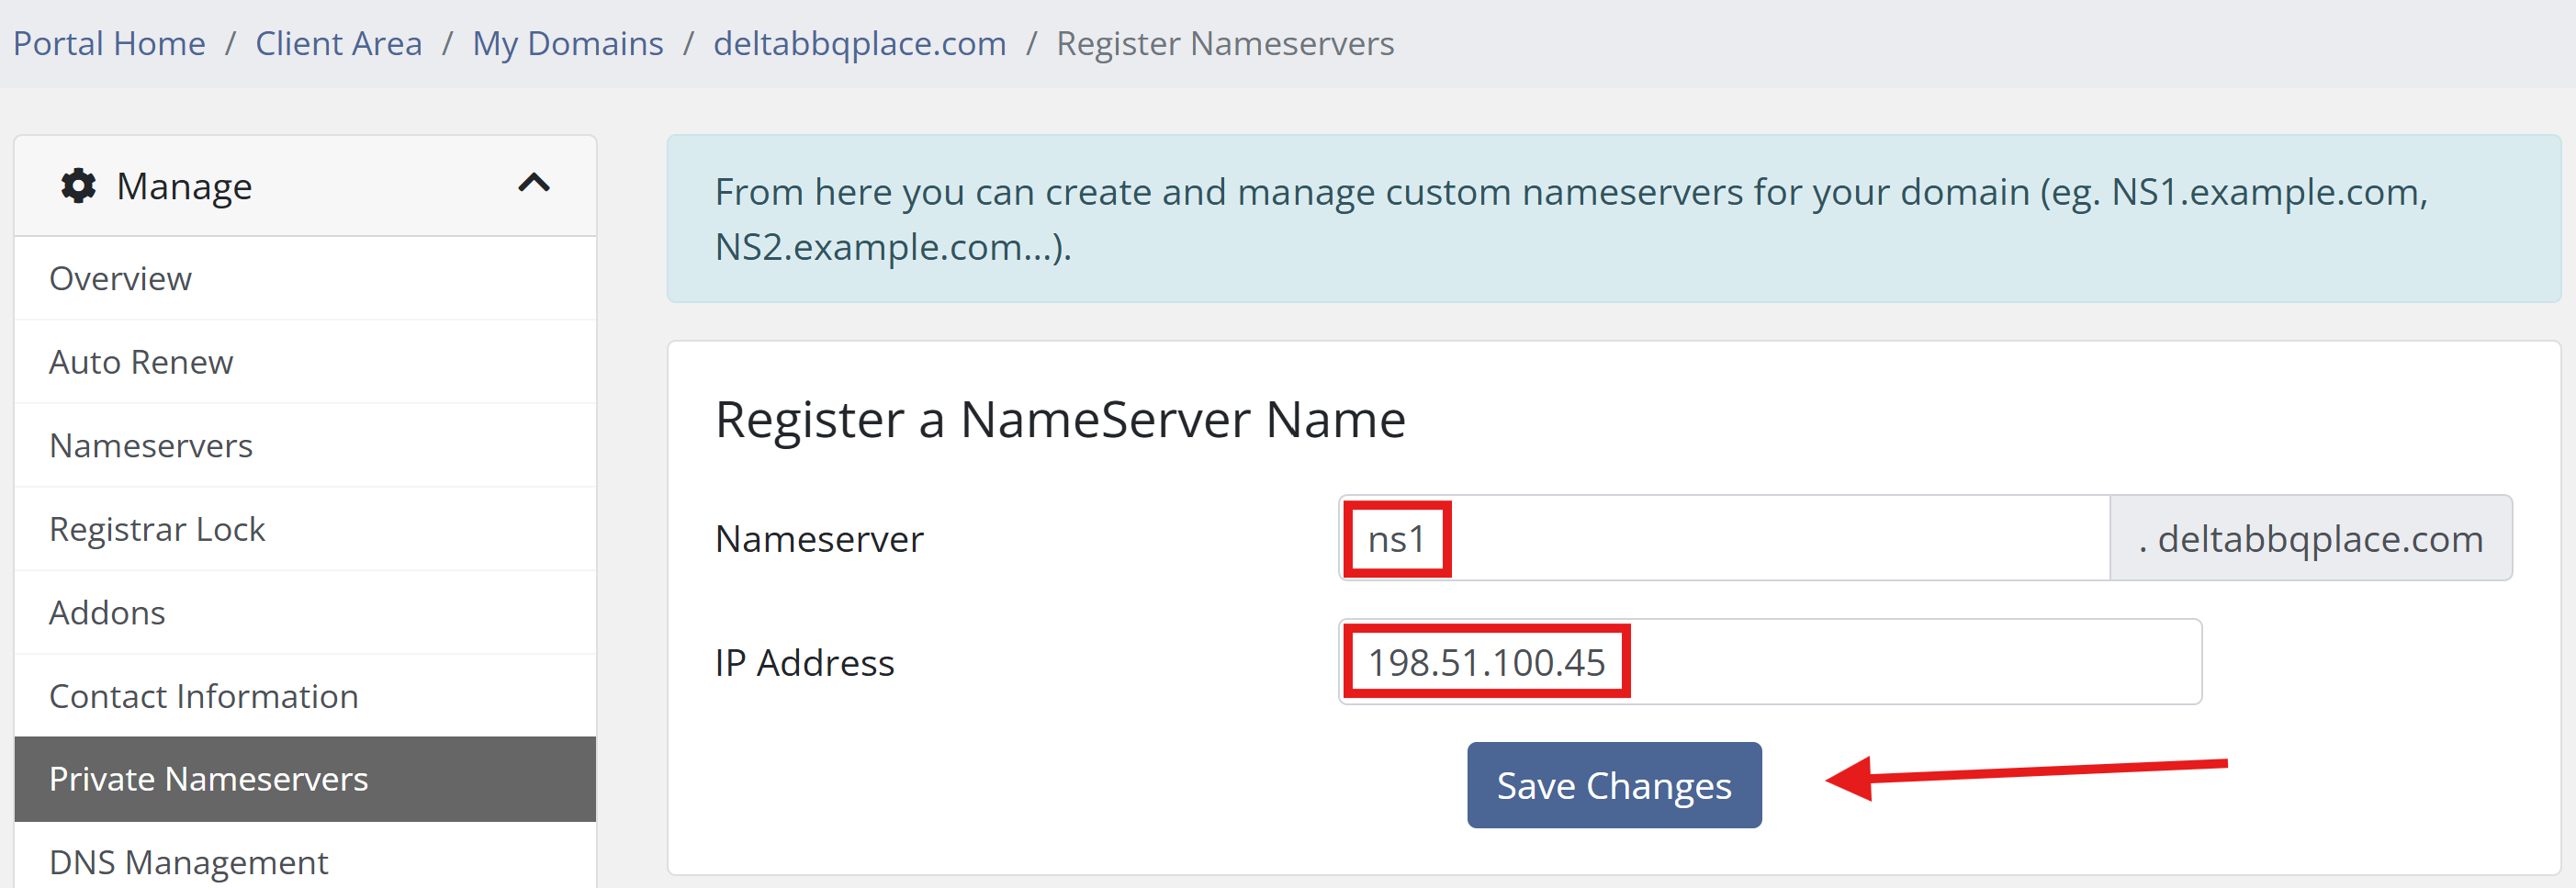
STEP 3: Click on Private Nameservers

STEP 4: Enter the hostname (e.g. ns1.yourdomain.com) and the corresponding IP address. Do the same for the second nameserver (e.g. ns2.yourdomain.com). In this example, we're doing the first NS1. Do the same for the second nameserver (e.g. ns2.yourdomain.com). If you’re unsure what IPs to use, check your setup email or contact Bragghost support.
STEP 5: Login to your cPanel account and go to the Zone Editor. Create an A record for ns1.yourdomain.com → the IP you set in Step 4. Create another A record for ns2.yourdomain.com → its IP. If using IPv6, add an AAAA record instead (if applicable).

Allow for DNS propagation. Changes (especially nameserver updates) can take some time globally. Usually a few hours, sometimes up to 24-48 hours.
If you would like for our Technical Support team to do this for you, please either open a ticket or reach out to us via live chat!
